Photography is a powerful playground for creativity. It’s more than just capturing what you see; it’s about translating your unique perspective into an image that tells a story. If you’re feeling stuck in your photography or itching to experiment, exploring niche techniques can open new doors of creative expression. These lesser-known methods allow you to break the mold, challenge yourself, and create images that stand out.
Here, we’ll guide you through four fascinating photography techniques–light painting, tilt-shift photography, infrared photography, and freelensing. We’ll explain how each one works, what you need to get started, and tips to create stunning images. Let’s spark some inspiration and help you push your creative boundaries!
1. Light Painting
Light painting turns darkness into an artist’s canvas. By using a long exposure and moving a light source around, you can “paint” designs, patterns, or shapes directly into your photo. The result? Breathtaking images that look like glowing illustrations woven into a still photograph.
How It Works
- Light painting photography involves setting your camera to a long exposure, usually between 10 and 30 seconds. During that time, you move a light source, such as a flashlight, LED wand, or even sparklers, across the frame. The camera captures the path of the light as streaks or patterns. Anything stationary, like the background or a subject, remains sharp while the light traces appear fluid and magical.
What You’ll Need
- A camera with manual mode and the ability to set long exposures
- A tripod to keep the camera steady during the exposure
- A light source (flashlights, glow sticks, or LEDs work great)
- A remote shutter release or self-timer to minimize camera shake
Tips for Getting Started
- Find complete darkness: A dark environment, like a nighttime field or an unlit room, keeps distractions out of your frame.
- Experiment with light sources: Try different colors, shapes, or brightness levels for variety in your images.
- Practice your choreography: Plan your light movement beforehand or experiment freely to see what works.
- Pro tip: Use a longer exposure for more elaborate designs and a shorter one for quicker, minimal effects.
2. Tilt-Shift Photography
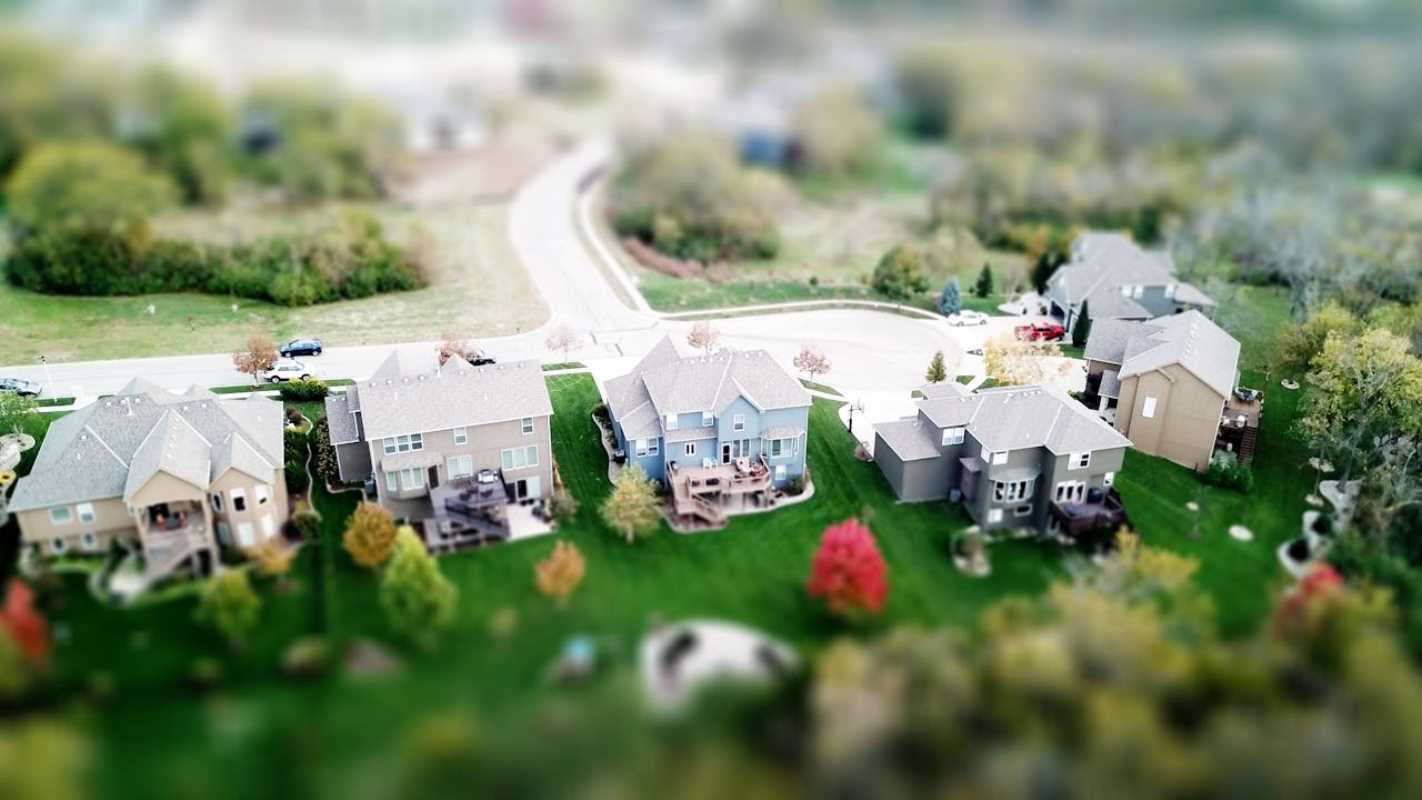
Imagine a bustling city street or a vibrant carnival scene—but it’s transformed to look miniature, like a model toy set. That’s the magic of tilt-shift photography. It uses a special lens or post-processing techniques to create whimsical, selective-focus images that blur reality.
How It Works
Tilt-shift photography manipulates your image’s plane of focus. By tilting and shifting the lens’s position relative to the camera, you can keep a section of your frame sharp and blur the rest. This selective focus creates the miniaturization effect, making real-life scenes appear like tiny dioramas.
What You’ll Need
- A tilt-shift lens (optional but ideal for authentic results)
- A DSLR or mirrorless camera
- Editing software as an alternative (many apps like Photoshop allow you to simulate tilt-shift blurring)
Tips for Getting Started
- Shoot from above: The miniature effect works best when taken from a high angle, emulating the way you’d look at models on a table.
- Simplify the scene: Large, cluttered scenes can become visually overwhelming. Focus on settings with minimal chaos, like a small market square or a train carousel.
- Use editing software: If tilt-shift lenses are out of your budget, you can replicate the look digitally using Photoshop's blur features or tilt-shift-specific apps.
Ideas to Try
Capture a bustling street market from a rooftop. Photograph a harbor filled with colorful boats. Or bring a fun twist to a wedding shoot by making guests look like tiny figures atop a tiered cake.
3. Infrared Photography
What if you could photograph a world that’s seemingly invisible to the human eye? Infrared photography does just that. By capturing light in the infrared spectrum (which humans can’t see), this technique unlocks dreamlike, surreal images where blue skies turn dark and green foliage glows white.
How It Works
Infrared (IR) photography relies on capturing wavelengths of light beyond what the naked eye can detect. You’ll either use an infrared filter or a specially converted camera to block visible light and photograph only the infrared spectrum. The results are otherworldly landscapes and portraits!
What You’ll Need
- A camera converted for infrared photography OR
- A standard camera with an infrared filter
- A tripod for stable long-exposure shots (infrared tends to require longer shutter speeds)
Tips for Getting Started
- Shoot in sunlight: Infrared photography thrives on outdoorsy scenes full of natural light. Bright, sunny days with leafy trees work especially well.
- Learn post-processing: Raw IR photos often come out with odd color casts. Software like Lightroom or Photoshop can help you fine-tune the surreal color effects.
- Start simple: Focus on high-contrast landscapes or standalone trees for easy, dramatic results.
Ideas to Try
Capture a tranquil lake where the trees glow white against a near-black sky. Contrast a glowing green field with the deep shadows of a building. Play with textures like water ripples or wool clothing for unexpected effects.
4. Freelensing
Want to experiment without breaking the bank? Freelensing can make your images look as though they’re taken with an expensive tilt-shift or lens baby lens. All you need is your existing lens–and the courage to remove it! This DIY approach involves holding your lens slightly detached from the camera body to create dreamy, light-leaking effects.
How It Works
By detaching your lens and angling it manually, you manipulate the focus plane in real-time. Depending on the angle, you can create selective areas of sharpness, wild bokeh effects, or glowing light leaks. Freelensing lets you explore endless creative options with full flexibility over positioning.
What You’ll Need
- A DSLR or mirrorless camera
- Any standard or prime lens (ideally a 50mm)
- A careful hand (detached lenses can expose the camera's sensor)
Tips for Getting Started
- Perfect the angle: Experiment with how much to tilt and shift the lens for subtle or exaggerated effects.
- Focus manually: Autofocus doesn’t work with a detached lens, so you’ll need to make adjustments by eye.
- Be cautious of dust: Detaching the lens exposes your sensor, so practice in clean environments to avoid any debris entering the camera.
- Use natural light: Experiment with sunlight streaming through windows or flowing across a landscape to maximize your light play.
Ideas to Try
Use freelensing for a hazy, romantic portrait. Create surreal landscapes with blurred peripheries and enhanced central focus. Or, play with partial-focus storytelling by highlighting one detail while blurring the rest.
Taking the First Step in Your Creativity Journey
Why not pick one technique that piques your curiosity and give it a shot? Start small with the tools you have, and don’t be afraid to make mistakes–playing and learning is part of the process. Break out of your routine, pick up your camera, and embrace the beautiful unknown.
 (Image via


